Why I Migrated My iCloud Photos to My OwnCloud Server
The Realization: iCloud Isn’t Really “Yours”
Like most iPhone users, I once trusted iCloud with all my photos, WhatsApp backups, and device data — until that dreaded notification appeared:
We all start with 5GB of free storage. It sounds fair until you realize how fast it fills up — between iPhone photos, iPad syncs, and random app data, it disappears in days.
At some point, I realized I was paying just to store my own memories on someone else’s server.
So, I decided to stop renting space — and build my own.
Building My OwnCloud
Instead of paying monthly for more iCloud space, I set up OwnCloud inside my home lab. It’s a simple, open-source cloud platform that lets you host your own storage — completely private, expandable, and subscription-free.
Here’s my setup in a nutshell:
- Host: Ubuntu server (running Portainer)
- Deployment: OwnCloud via Docker stack
- Access: Reverse proxy through Cloudflare ZTNA
- Storage: Backed up to my local NAS
- Devices: iPhone, iPad, and desktop client synced seamlessly
It runs quietly alongside my other stacks like Oxidized, Uptime Kuma, and Streamlit dashboards — just another member of my home-lab ecosystem.
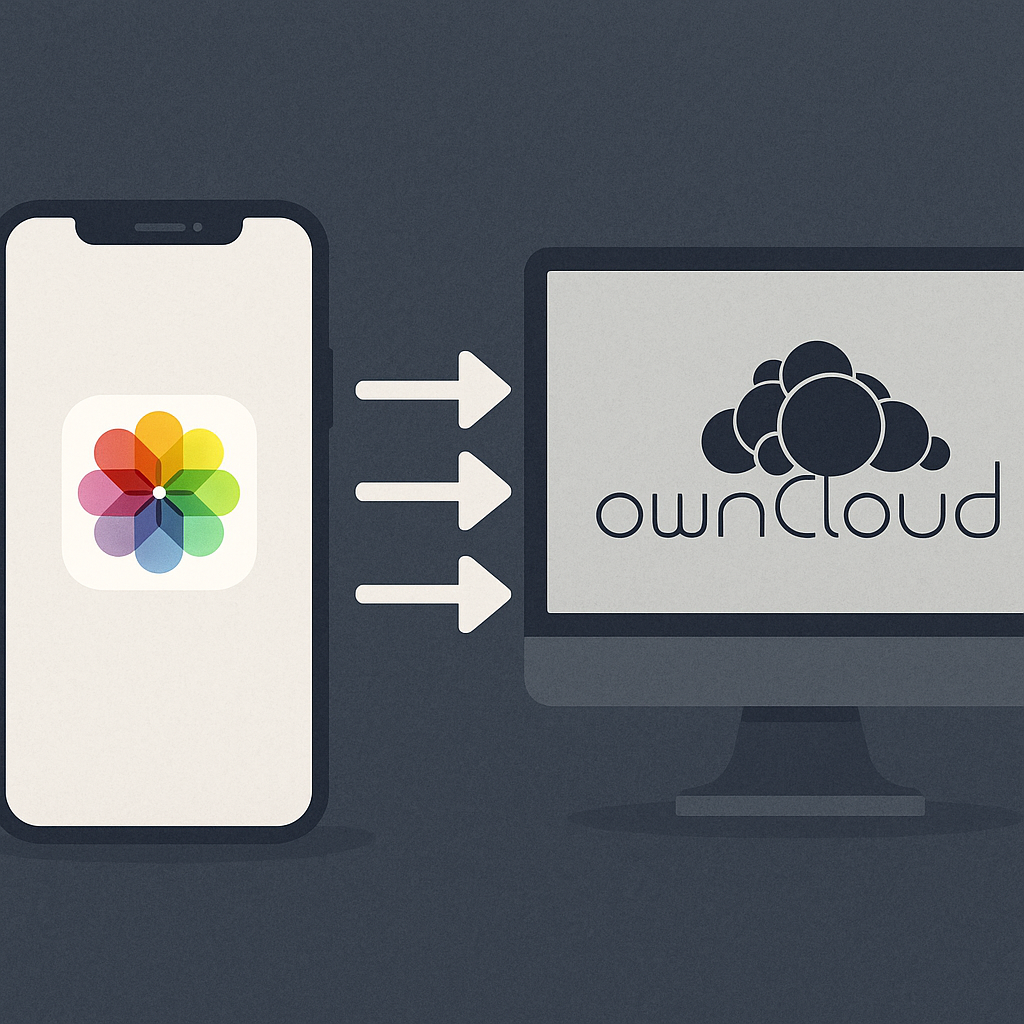
How It Syncs: Photos Straight from iPhone
OwnCloud’s iOS app makes the experience feel surprisingly Apple-like. Once configured, every new photo I take is automatically uploaded to my OwnCloud storage through the app’s Media Upload feature.
From there:
- I can review and delete unwanted shots directly in the OwnCloud app.
- It automatically uploads screenshots, videos, and images from my gallery.
- My desktop instantly syncs the same folder for easy retrieval when writing blog posts or editing images.
No iCloud needed. No middleman. Just my own cloud — syncing in real time.
Setup Guide: How I Built It
If you’d like to replicate this, here’s how my stack looks under Portainer:
1. Create a Docker Stack in Portainer
Under your Portainer dashboard, create a new stack and paste this:
version: "3.8"

services:
  owncloud:
    image: owncloud/server:latest
    container_name: owncloud
    restart: always
    ports:
      - "8080:8080"
    environment:
      - OWNCLOUD_DOMAIN=localhost:7003
      - OWNCLOUD_TRUSTED_DOMAINS=cloud.hak1m.me,192.168.2.20:7003
      - OWNCLOUD_DB_TYPE=mysql
      - OWNCLOUD_DB_HOST=192.168.2.20:32768
      - OWNCLOUD_DB_NAME=owncloud
      - OWNCLOUD_DB_USERNAME=user
      - OWNCLOUD_DB_PASSWORD=password
      # first-time bootstrap (optional)
      - OWNCLOUD_ADMIN_USERNAME=admin
      - OWNCLOUD_ADMIN_PASSWORD=password
    volumes:
      - owncloud_data:/mnt/data

volumes:
  owncloud_data:
Deploy it, and you’ll have your own cloud instance running at http://yourserverip:8080.
2. Add a Reverse Proxy via Cloudflare ZTNA
I connected it securely using Cloudflare Tunnel (ZTNA).
This lets me access https://cloud.awalhakim.com from anywhere in the world without opening any ports on my home router.
If you don’t have a domain yet, you can use a Cloudflare subdomain for free and still enjoy secure HTTPS.
3. Connect Your Storage
For me, the storage path (/opt/owncloud/data) is mounted directly to my NAS.
That means all my photos are automatically backed up locally — and if I ever expand my NAS capacity, my cloud grows with it.
This setup is fully scalable:
- Add more drives to expand your storage.
- Or, deploy it on any VPS if you don’t have a home lab.
4. Sync from Your iPhone
- Download the OwnCloud app from the App Store.
- Log in with your domain (e.g.,
cloud.awalhakim.com). - Go to Settings → Media Upload and enable:
- Upload new photos automatically
- Include videos and screenshots (optional)
That’s it. Every new photo will now sync automatically to your OwnCloud server — just like iCloud, but without the subscription wall.
Why This Matters
It’s not about rebelling against Apple.
It’s about owning what’s yours — your data, your photos, your digital life.
Self-hosting puts you in control. No hidden terms, no pricing tiers.
If I ever need more space, I just plug in another hard drive.
For me, OwnCloud became more than storage — it’s a personal ecosystem that grows with me.
While OwnCloud gives you a powerful self-hosted cloud with internet access, some readers prefer a local-only photo backup solution — one that never touches the internet at all. In that case, I walk through a simpler OpenMediaVault + PhotoSync setup in my other article:My Local-Only iCloud Alternative: OpenMediaVault + PhotoSync Without Internet Exposure
Final Thoughts
Owning your cloud feels different. It’s not as polished as iCloud, but it’s personal, private, and limitless.
And when I take a photo today, I know exactly where it lives — on my own hardware, in my own network, under my own control.
If you’re tired of paying rent to store your memories, maybe it’s time to build your own too.